Goldfish memory is one of the symptoms of AI psychosis, right?
When I give tasks to agents, I tend to run several at once. But I don’t always keep track of what’s happening with each one. Some are done and need testing; others are waiting for my input. Short sessions are easy enough to follow. Once planning or implementation takes a few minutes, I can forget about one of the tasks.
That’s where I use TlgMe. It’s a CLI tool that lets an agent send me a Telegram message or ask me a question and wait for my reply.
I set up a simple rule: send me a Telegram notification if implementation takes more than five minutes. When an agent babysits a pull request, waits for tests to go green, or responds to code review comments, that can take 10–20 minutes.
For example, after checking a pull request, the agent can tell me it’s done from the command line:
tlgme --text "Tests passed, pull request ready for review"
While the agent works through the slow parts, I can switch to another task and get an alert from my own Telegram bot.
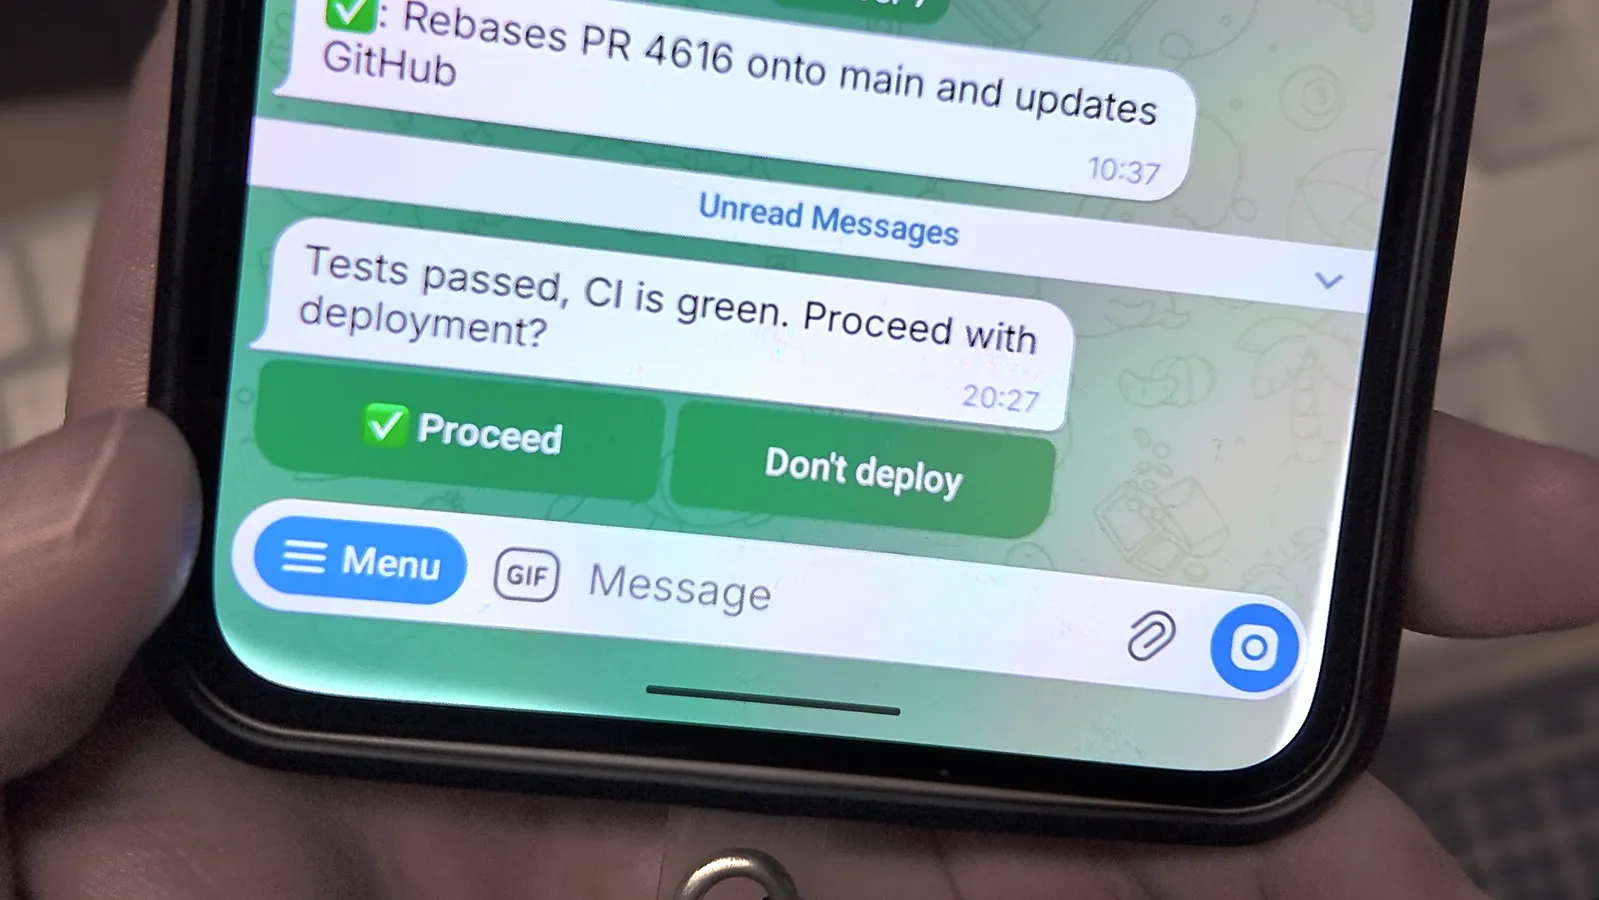
If I’m heading out and need to keep an eye on the agent’s work, it can message me with a question. It can also send a plan with “Approve” or “Request changes” buttons.
An agent asked me whether it should deploy the current PR changes
The notification shows up on my phone and Mi Band.
In my global AGENTS.md, I added a rule: if the build stage takes more than five minutes, the agent should call tlgme.
I like this setup and want to keep developing it. I’d like the agent to know whether I’m at my computer, then decide where to send updates, how much detail to include, and where to ask questions.
Before AI finally takes our jobs, we still have time to burn tokens on something important, like small personal technical nonsense. Today’s nonsense is a two-button macropad from Temu.
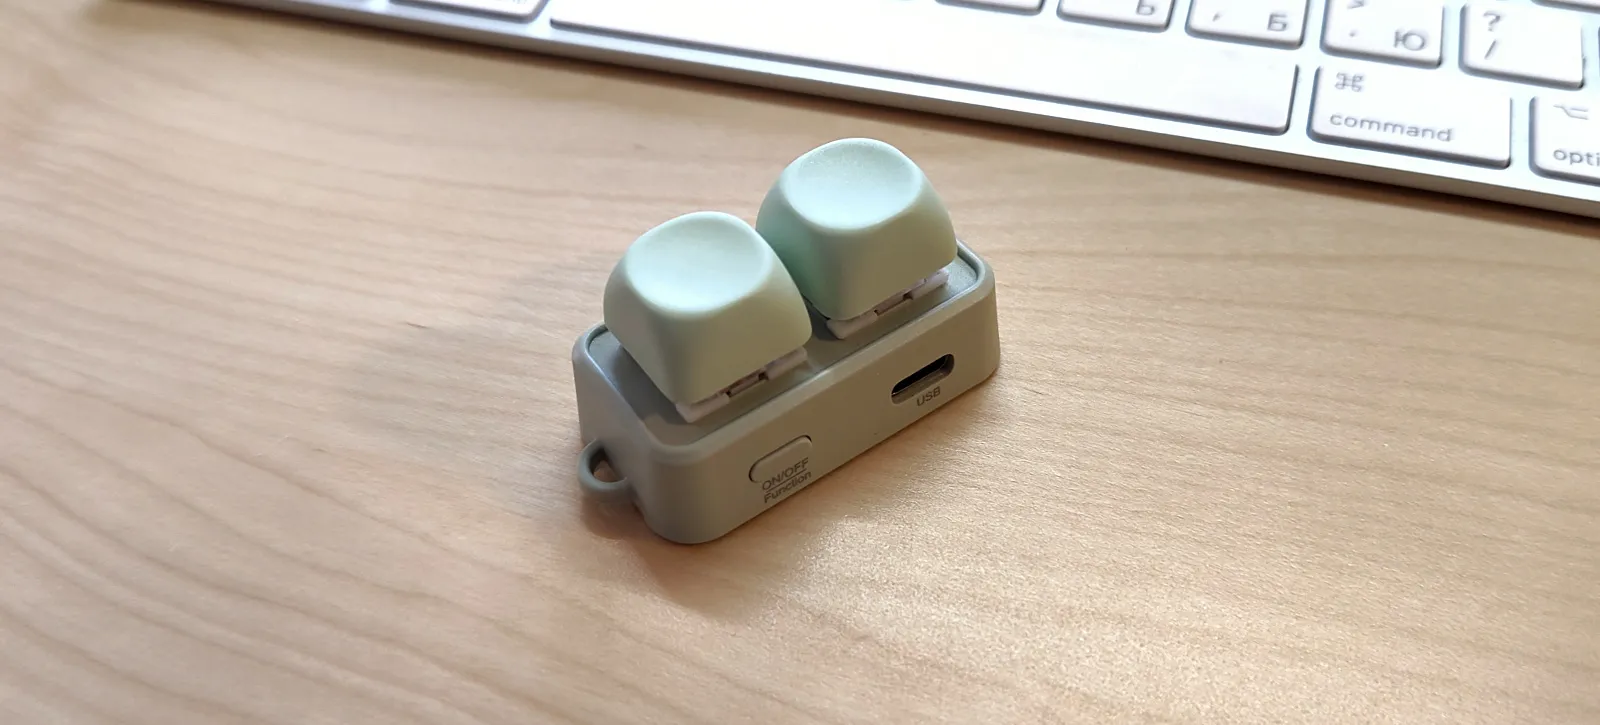
Hanlin Yue Free 2 mini macropad keyboard device
I ordered a Hanlin Yue Free 2 mini keyboard. It has two buttons, and the product description promised macros, key assignments, swipes, and volume control. Basically, a tiny remote for minor automation.
The problem started exactly where it usually starts: in the native configuration app. It turned out to be such a beautiful specimen of disposable software that after the first few seconds you start staring into the abyss. And the abyss stares back through a broken UI.
I wanted to know whether I could configure the macropad without that app. Because the app itself, I suspect, is beyond help.
So I bought a cheap two-button keyboard and, along with it, an excuse to write a CLI utility and control exactly which keys get written to the device.
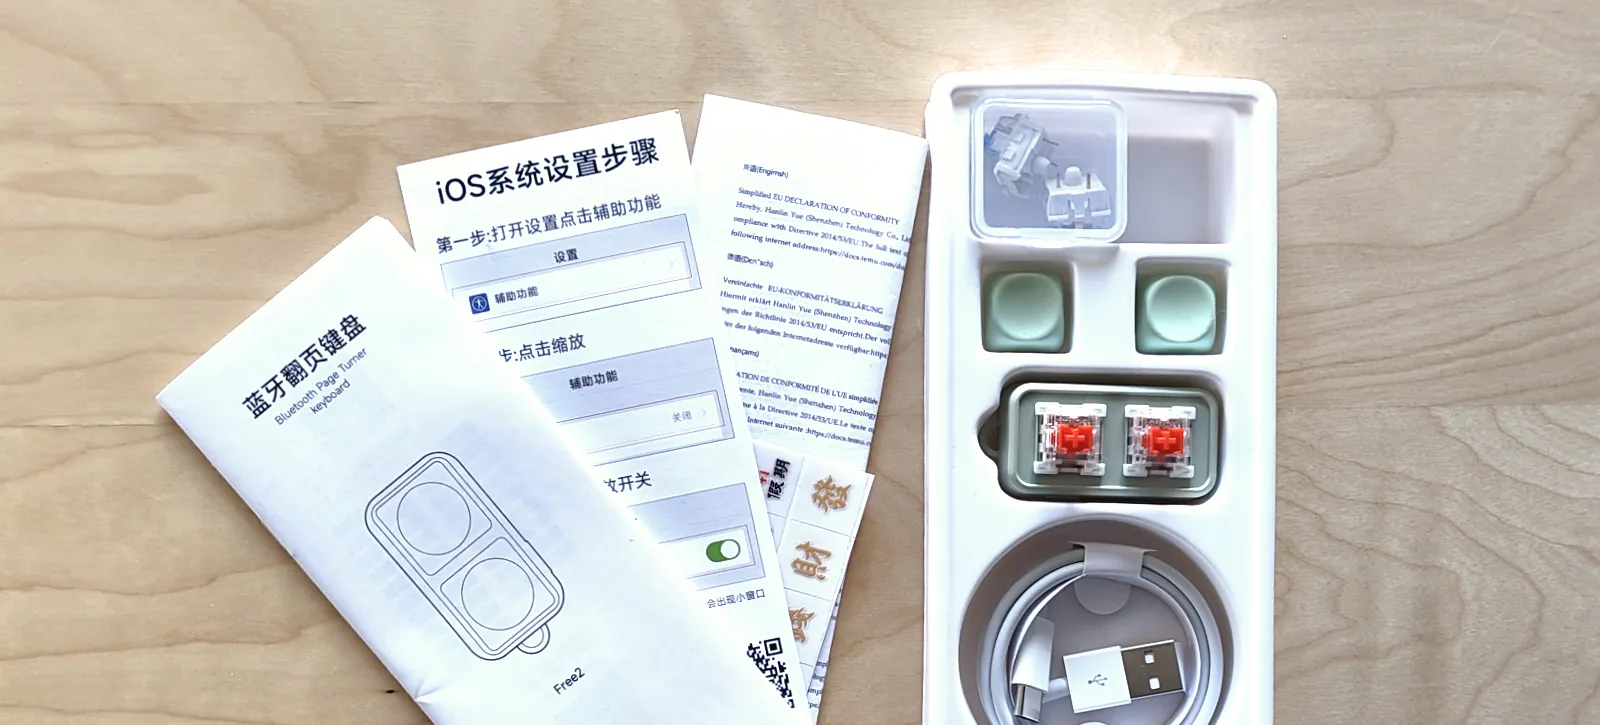
The bundle is equipped with more clicky switches
My personal use case was very mundane: make a button type a predefined sequence of keystrokes. For example, a long password or some other string that is annoying to type by hand every time.
Important disclaimer right away: I would not store a corporate password on a device like this, and I would not recommend it to anyone. It is a bad idea. Passwords are better kept in a password manager, in your head, or, if you are doing it truly old-school, in a paper notebook.
The whole bundle includes a direct-to-trash USB cable, docs and labels
But as a technical experiment, why not.
Humble reverse engineering
The native app turned out to be an Electron app. Inside was an obfuscated JavaScript bundle and the faint feeling that someone really wanted to close a Jira ticket as fast as possible.
With the help of agents, AI tools, and ordinary human stubbornness, I partially reverse-engineered the app for this macro keyboard.
The task was simple to describe: understand how the app talks to the device and how it writes key assignments into it. The execution was less pleasant and not so quick as people usually advertize on LinkedIn.
Over the course of a day, the agent picked apart the app, pulled out the relevant chunks of logic, tested hypotheses, and asked me to try its utility on the physical device. I pressed buttons, watched the result, and slowly turned into a lab bench with a USB port.
Then things started to line up.
Technical and other limitations
Right now, the macropad can be programmed to send predefined keystrokes when a button is pressed.
The result is almost working. With one caveat: the device has strict limits on how many events can be written to it. And it doesn’t seem the number and order of events might be optimized anyhow.
After a lot of experiments, I found that one button press can store roughly 19-20 events. A key press, a key release, and a delay are all separate events.
Even a simple string quickly becomes a small accounting exercise. If you alternate presses, releases, and pauses, you can fit something around five lowercase characters. Uppercase is even tighter: about four characters, because you need to hold Shift.
I did not go down the path of building my own device on a microcontroller board. Without a 3D printer, making something finished and reasonably neat would be hard. And for a one-off device, that becomes a separate hobby inside the hobby. You really have to love hardware to go there for the sake of two buttons.
Still, the approach itself feels interesting.
You can take a ready-made gadget and negotiate with it until it behaves, by hacking it a little, adapting the software to your needs, or disconnecting it from some proprietary cloud.
After all these “agent this and agent that”, it felt like we were supposed to become too lazy for understand details. Here, AI worked in an unexpectedly pleasant way: it lowered the entry barrier for a small weird project I probably would never have reached otherwise.
But the nicest part of this story turned out to be something else.
It is just that now curiosity survives long enough to reach a result a little more often.
IDEs like VS Code, Cursor, or Trae, along with CLI LLM clients such as Claude Code, Gemini, or Codex, can serve as interesting alternatives to web-based interfaces like ChatGPT. These tools offer a way to work with LLMs for text generation with one notable difference: results are saved locally by default, unlike web interfaces where conversations might be lost or stored on remote servers.
This doesn’t replace web-based ChatGPT entirely, it’s still very convenient on mobile devices—but for certain tasks like editing notes, drafting documents, or writing specialized texts, IDE-based and CLI LLM clients might be worth considering. They can fit naturally into an existing development workflow.
Some benefits I’ve noticed: you can edit project-specific rules directly from the chat interface, reference local documents from your project, and maintain context of your work environment. Features like web search and MCP (Model Context Protocol) integrations are also available in some of these tools.
A Practical Use Case: Corporate Reviews
I’ve been experimenting with a setup for writing corporate self-reviews and peer reviews using this approach. The workflow is fairly simple: a rules file acts as both instructions and context for the LLM, which helps avoid repeating the same explanations each time.
By referencing local documents with previous reviews, the LLM can take inspiration from existing examples, which seems to help with maintaining some consistency in style and tone. All outputs go into Markdown files, creating a searchable archive that sits alongside other project documentation.
For me, this has made what used to be a somewhat tedious task feel more like a collaborative writing process. The LLM helps with articulating ideas while I keep control over the final content—all without switching away from the IDE.
Creating Your Own Rules File
First thing to do is to create the actual rules file:
Tool
Configuration File Location (path relative to the root)
Claude Code (CLI)
CLAUDE.md
Codex CLI and Extension
AGENTS.md
Copilot Extension
.github/copilot-instructions.md
Cursor
.cursorrules
Or create universal one with symlinks:
#!/bin/bash# Create the main rules filetouch AI_RULES.md# Create symlinks for different toolsln -sf AI_RULES.md CLAUDE.mdln -sf AI_RULES.md AGENTS.mdln -sf AI_RULES.md .cursorrules# Create .github directory and symlink for Copilotmkdir -p .github && ln -sf ../AI_RULES.md .github/copilot-instructions.md
The key to making this setup work is having a well-structured rules file. Based on my experience with corporate reviews, here’s an approach that might be helpful:
Define the persona — Specify the role you want the LLM to take (e.g., HR consultant, technical writer, editor). This sets the tone for all interactions.
Provide essential context — Include any frameworks, standards, or rating scales relevant to your task. For reviews, this might be your company’s culture values or performance criteria.
Break down into sections — Create separate guidelines for different parts of your task. This helps the LLM understand what’s expected in each context.
Add custom commands — Define shortcuts for common operations (like corp edit for editing text in a specific style). This saves time on repetitive instructions.
Include real examples — Add a few good examples showing the desired output. This is often more effective than lengthy descriptions of what you want.
Let the LLM help formulate rules — You can ask the LLM to help write rules for your rules file, then ask it to confirm understanding. This collaborative approach can help refine your instructions.
Use the LLM as a reviewer — Ask the LLM to rate your inputs or its own generated results according to the scales or examples you’ve provided in the rules file. This helps ensure consistency and quality.
Different tools use different filenames for their instruction files:
The rules file becomes your “permanent instructions” that persist across sessions, so you don’t need to re-explain context each time you start working.
It’s worth noting that the best dock placement is in Ubuntu, because it occupies the entire vertical strip on the screen. When windows are expanded to full width, the dock maintains the vertical alignment and the desktop doesn’t shine through it. Without additional software on Mac, this won’t work the same way.
My Dock is located on the side, hidden by default, with adjusted appearance and hiding speeds. Recent application history is not displayed because I don’t need it. Windows expand to full screen.
I launch applications through Raycast—it’s both more convenient and faster.
The Downloads and Screenshots folders are pinned in the dock.
Screenshot Settings
By default, screenshots are saved to the desktop, which quickly clutters it.
This setting changes the screenshots folder to a custom location. It also disables window shadow capture when taking screenshots.
You can then add this folder to the dock for easy access to recent screenshots.
Desktop Switching
By default, MacOS rearranges virtual desktops, placing the most recently used ones closer to the current one. This is very confusing when multiple applications are in full screen mode. The following settings disable this behavior:
defaults write com.apple.dock "mru-spaces" -bool "false"killall Dock
Applications
In MacOS I’m missing some features from different Linux distributions and operating systems. For example, window management in Omarchy is organized in a very interesting and convenient way in my opinion. The huge number of icons in the menu bar is a hereditary issue of macOS and its applications. Spotlight was also improved only recently.
The package manager needs to be installed separately, while in Linux there are many of them and at least one is available out of the box. To make the user experience a bit more convenient, I install the following applications. The installation criterion is simple: if the problem can be solved by existing means, then the application is not needed.
Homebrew — package manager
Raycast — for launching applications, clipboard history, caffeine mode to keep the computer from sleeping, and many plugins. Unfortunately, settings can no longer be saved locally, and settings synchronization requires a subscription.
Ice — for hiding icons in Menu Bar
Loop — for managing windows from the keyboard
Default Settings Reference
For a comprehensive reference of macOS defaults commands and system preferences that can be customized via the command line, check out macos-defaults.com — an excellent resource with visual examples and detailed explanations of various system tweaks.